How to solve the problem with the need for more and more space for corporate emails due to the IMAP protocol
The problem with emails due to IMAP
The space you have for email in your web hosting plan is finite.
With the advent of mobile phones, the use of the IMAP protocol is very widespread. With this protocol, you can view your emails from multiple devices (desktops, mobile phones, tablets). With the IMAP protocol, reading emails is not equivalent to deleting them from the mail server.
This results in the mail account constantly filling up and needing more and more space.
But this is a never-ending process. No matter how much space is given, sooner or later it will not be enough.
The solution
Next, I’ll describe the process by which you can read your emails through your Gmail account. In 9 simple steps.
Emails are read using the POP3 protocol and transferred to Gmail.
This means that once downloaded, they are deleted from your email account and transferred to your Gmail account, where they can be read by multiple devices (desktops, mobile phones, tablets).
A prerequisite for the following is that you must have a Gmail email account (e.g. [email protected]).
In the following steps we use [email protected] and mail.mydomain.gr as examples. You will need to replace with your own email and your own mail server.
Step 1
Collect the login details in your email
(The example is for the email [email protected], adapt accordingly for your own email)
Username: [email protected]
Password: [The password you have been given or set]
Incoming Server: mail.mydomain.gr (replace mydomain.gr with your domain name)
IMAP Port: 993 POP3 Port: 995
Outgoing Server: mail.mydomain.gr
SMTP Port: 587
IMAP, POP3, and SMTP require authentication.
Step 2
Sign in to your Gmail account(https://www.google.com/gmail/).
At the top right, you will find the settings icon (it has the form of a gear) click on it.

From the menu that appears, click on “See all settings“.
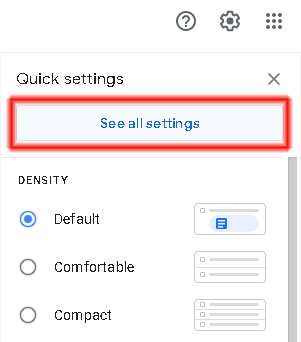
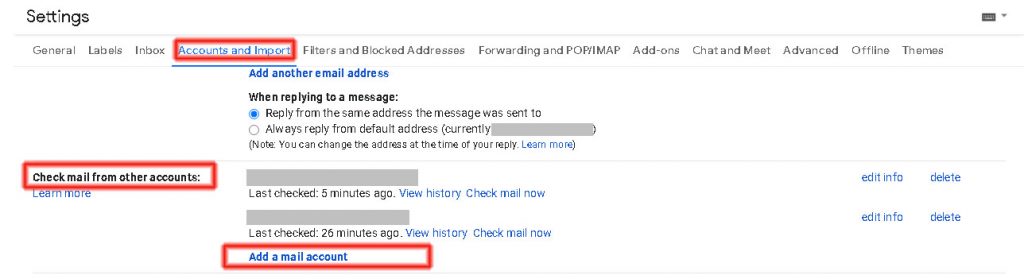
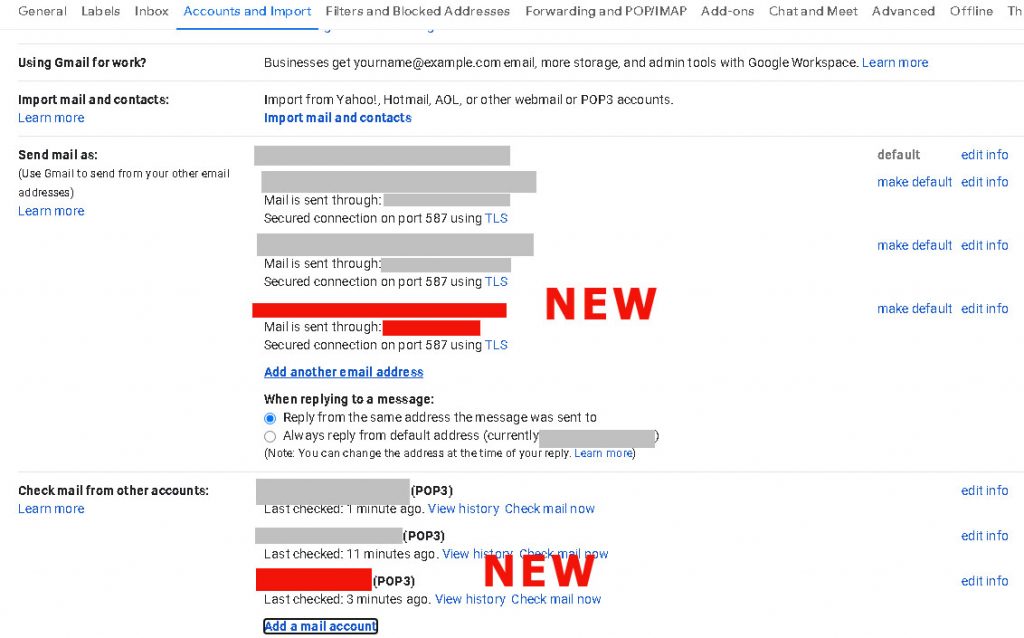
Click on the “Accounts and Import” tab.
On the same screen, and in the “Check mail from other accounts” section, click on “Add email account“.
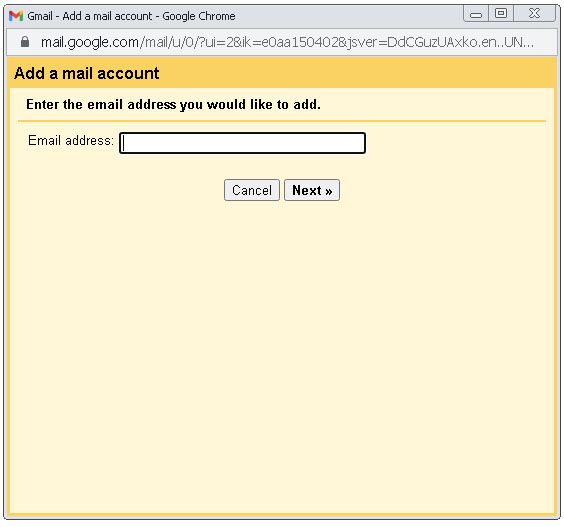
Step 3
A window appears with a title: “Add a mail account – Enter the email address you would like to add.”.
In the field “Email address” the email address you want to add. E.g. user@mydomain. gr
Click on the “Next” button.
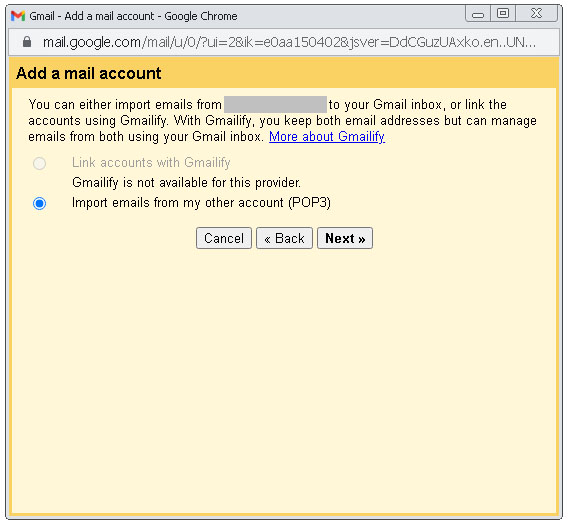
Step 4
On the next screen check the “Import emails from my other account (POP3)” option.
Click on the “Next” button.
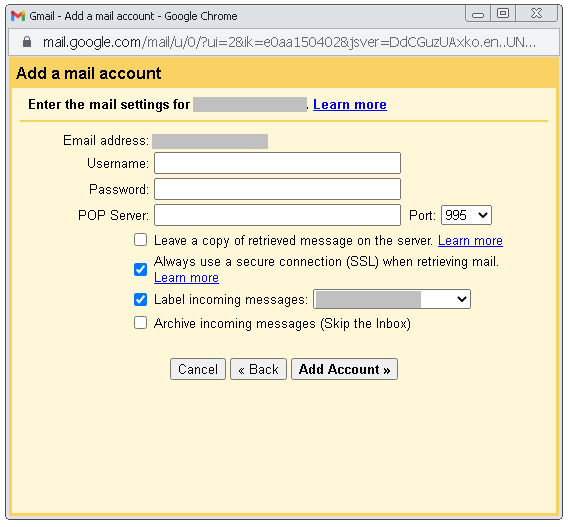
Step 5
On the next screen, enter the details for reading POP3 emails and transferring them to your Gmail account.
Please complete as follows:
Username: [email protected]
Password: [Your email password]
POP Server: mail.mydomain.gr
Port: 995
Check “Always use a secure connection (SSL) when retrieving mail“.
Check “Label incoming messages” and make sure to display your email in the adjacent field.
Click on the “Add Account” button.
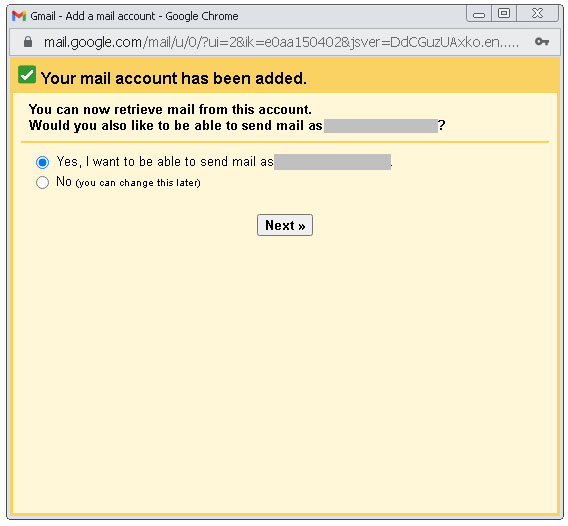
Step 6
The next screen will ask you if you want to send email through Gmail as [email protected].
Check the “Yes, I want to be able to send mail as…” option.
Click on the “Next” button.
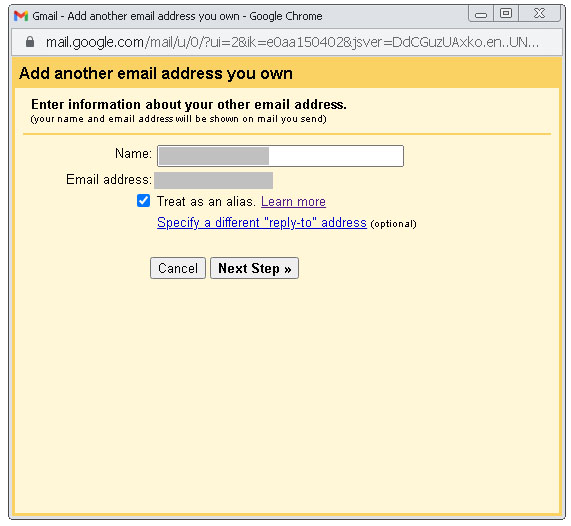
Step 7
A window appears with a title: “Add another email address you own“.
In the “Name” field, enter the name you want to be displayed.
In the “Email” field your email address is displayed. E.g. [email protected]
Check the “Treat as an alias” box.
Click on the “Next Step” button.
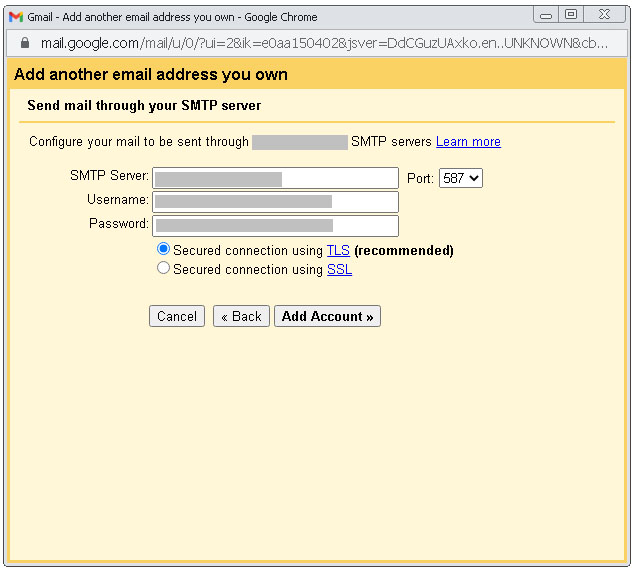
Step 8
We proceed to the next step “Send mail through your SMTP server” where the form asks for the details to send email.
Complete as follows:
SMPT Server: mail.mydomain.gr
Port: 587
Username: [email protected] (our email)
Check “Secured connection using TLS (recommended)“
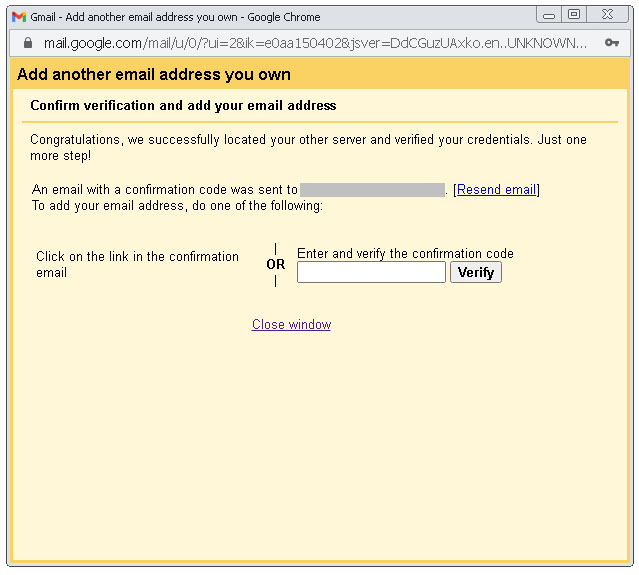
Step 9
One more step remains.
That of confirming that we are who we say we are.
The form has been changed to: “Confirm verification and add your email address“.
A Confirmation Code has been sent to your email.
Copy and paste it into the relevant field.
Click on the “Verify” button.
Congratulations!
You’ve just set up your email in Gmail.
Now you can view and send your emails through Gmail.
And your mailbox won’t be constantly full.
New emails will be read via the POP3 protocol and will appear in your Gmail account.
Wherever you are, whatever device you use (desktop, mobile phone, tablet), you can see your emails from one place.
And a reminder…
A free Gmail email account is not infinite either. It is limited to 15GB.